This tutorial describes how to manually edit LiDAR using the new inspection and editing functionality available in ‚lasview.exe‘ with the latest release of LAStools (version 140301). We will work with the familiar ‚fusa.laz‘ sample LiDAR data set from the LAStools distribution that was recently reported to have shown strange symptoms assumed to be side-effects of the LAZ cloning experiments in the ESRI labs … (-;
Inspecting LiDAR files with cross sections
Copy ‚fusa.laz‘ from the folder ‚lastools\data‘ to the folder ‚lastools\bin‘. Run ‚lasview.exe‘ so that it loads ‚fusa.laz‘. Either do this via the GUI by double-clicking ‚lasview.exe‘, loading ‚fusa.laz‘ via the ‚browse …‘ menu, and then clicking the ‚VIEW‘ button or by entering the command below:
C:\lastools\bin>lasview -i fusa.laz
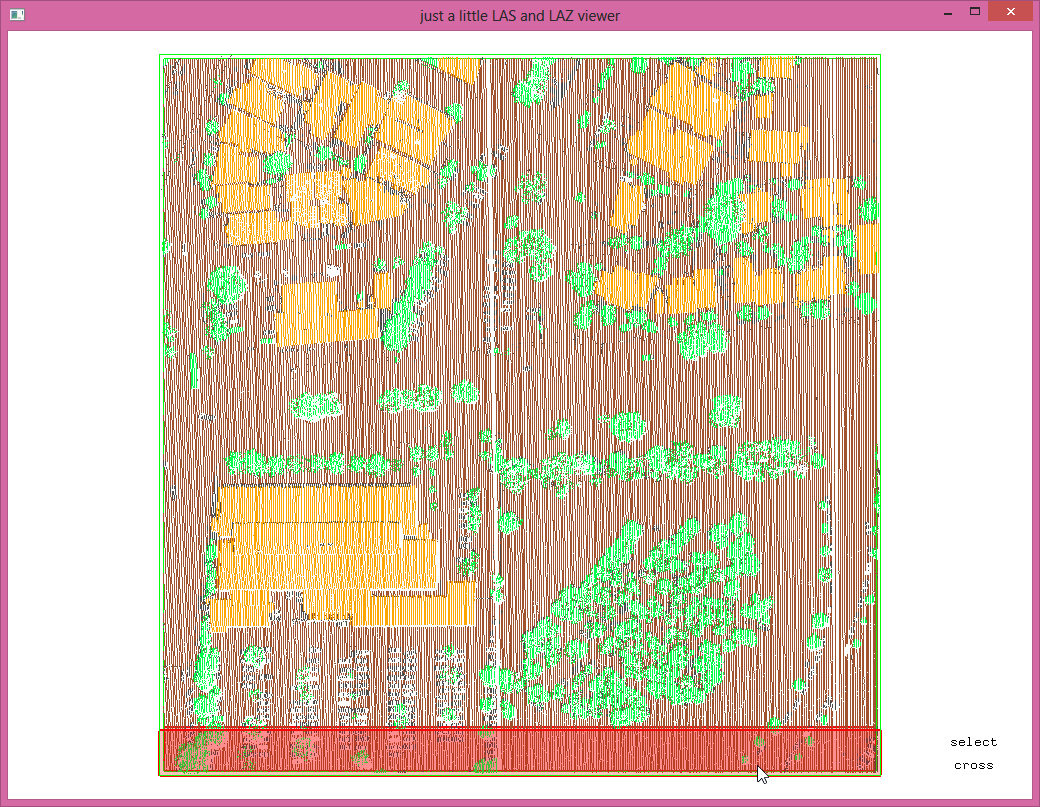
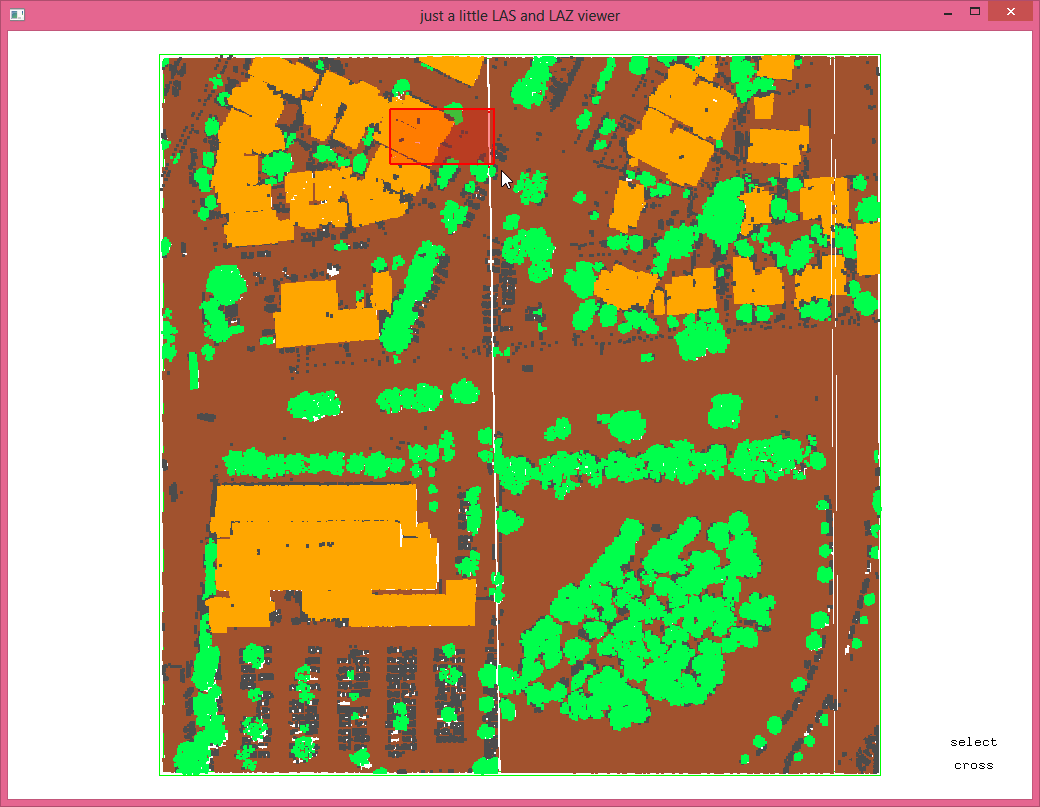
Press the <x> key to toggle to „select cross“ where you can pick a rectangular „cross“ section. The default cross section is a profile extending across the bottom of the bounding box.
By pressing the <x> key again you toggle back to actually view the cross section. Holding down <ALT> you can rotate the view to look at the cross section from the side. Holding down <CTRL> you can zoom in and out. Holding down <SHIFT> you can translate up and down or left and right. Increase or decrease the size of the points pressing <=> or <->. Hover with the mouse over a point and press <i> to inspect its coordinates and attributes.
Traverse the LiDAR file visually by moving the cross section with the arrow keys <UP> <DOWN> <LEFT> and <RIGHT>. You can move either in the „select cross“ view and see the picked rectangle move or in the „cross“ view and „walk“ through the LiDAR. Hold down the <SHIFT> key simultaneously to take bigger steps or the <ALT> key to take smaller steps. Inspect other points by hovering over them with the cursor and pressing <i>. The point information disappears when pressing <i> with the cursor over the background.
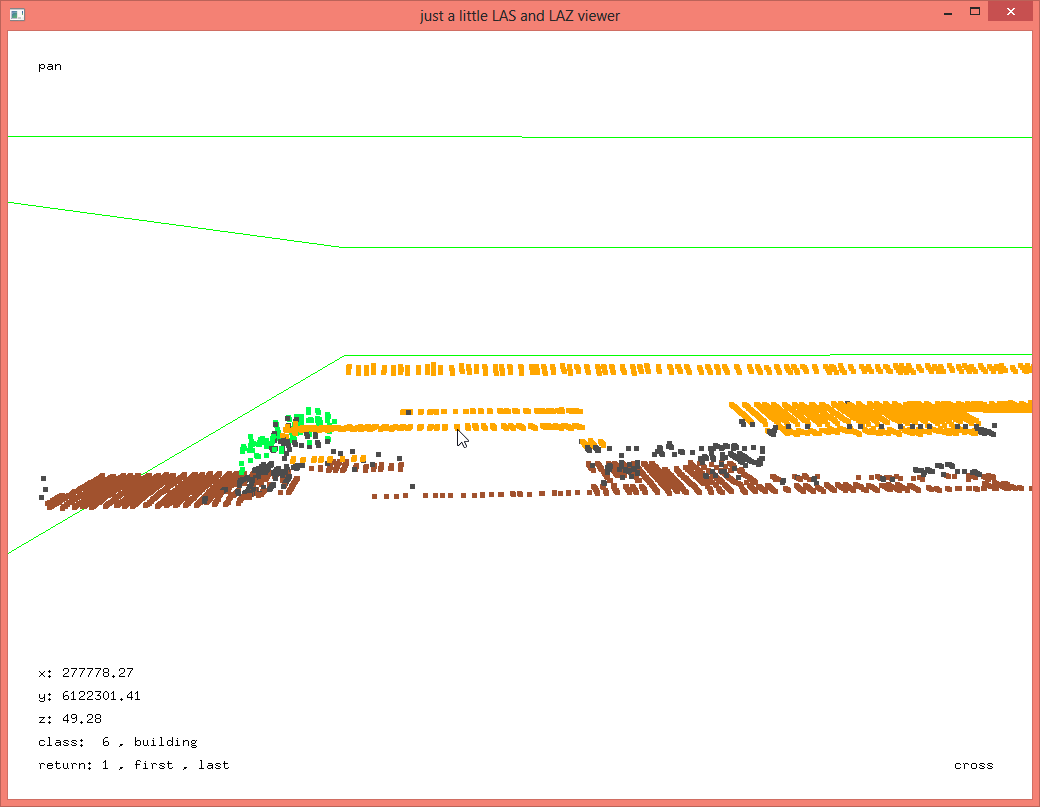 Toggle back to the „select cross“ view with <x> and pick approximately the same rectangle as shown below:
Changing Classifications and Deleting Points
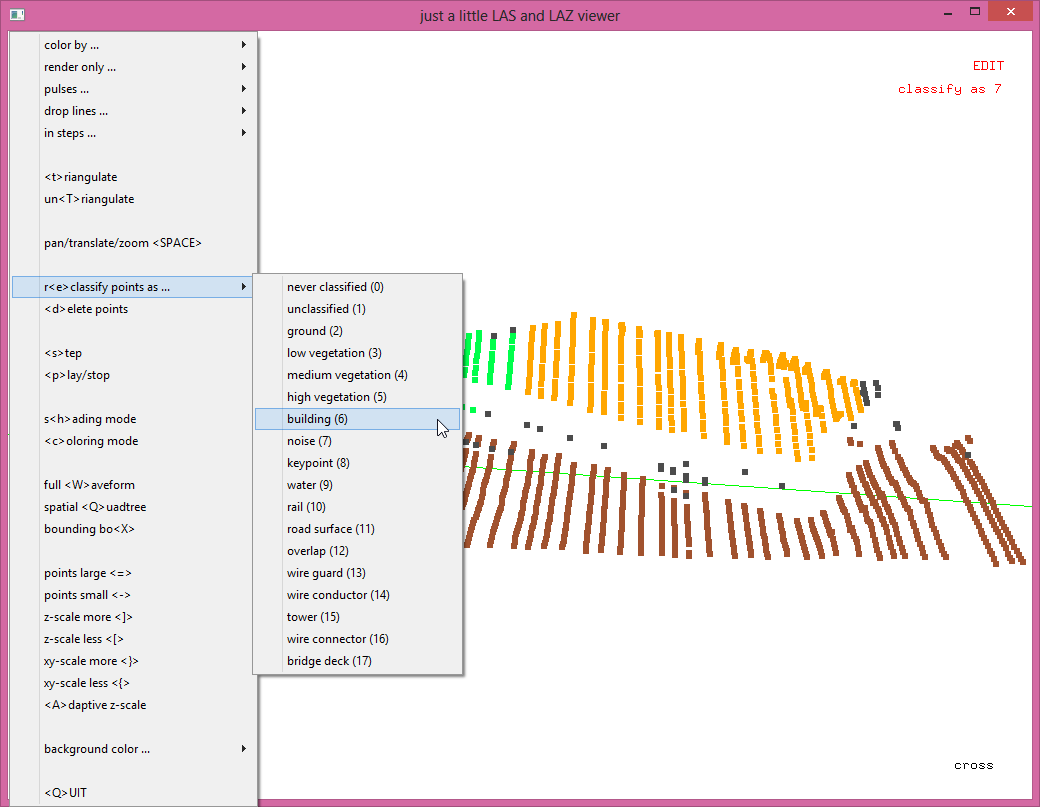
Continuing the steps above, toggle back to the „cross“ view by pressing <x>. Note that part of the roof of the house has been miss-classified as vegetation while others are left unclassified. Press <e> to turn on the „EDIT“ mode and right-click to select „reclassify points as building (6)“ via the pop-up menu.
Now use the cross-hair cursor to draw a polygonal fence around all points that should be reclassified. Press <ESC> to remove the last vertex of the polygon if you miss-placed it by a mistake.
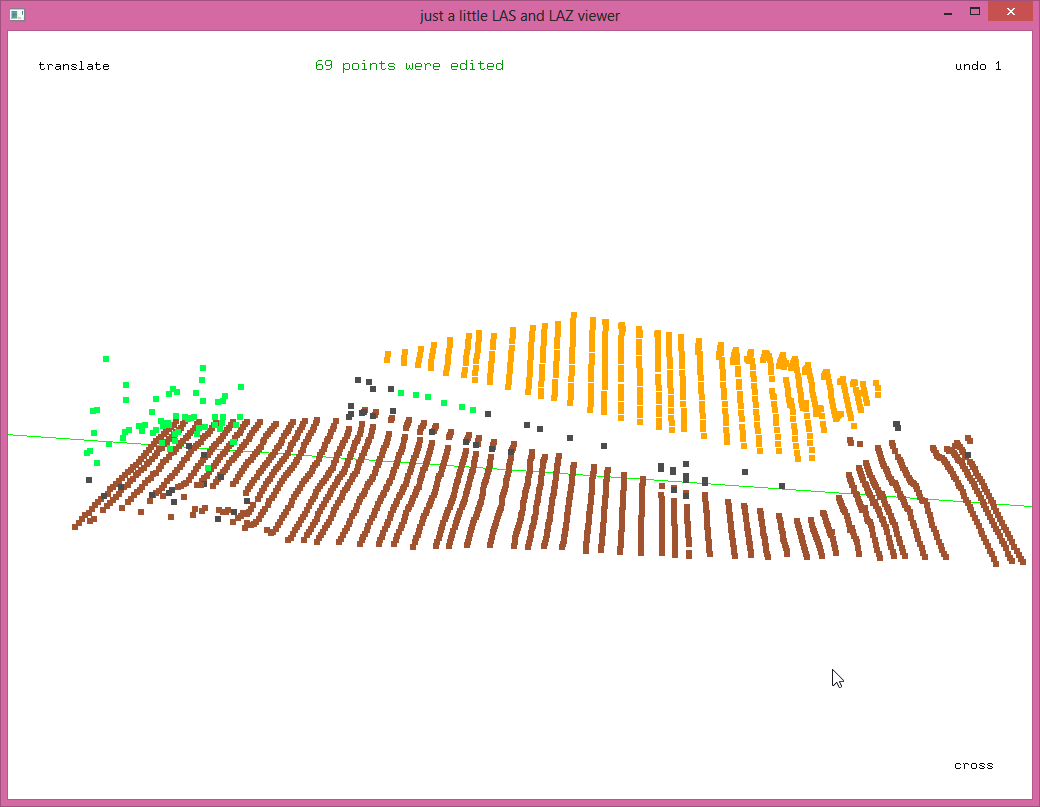
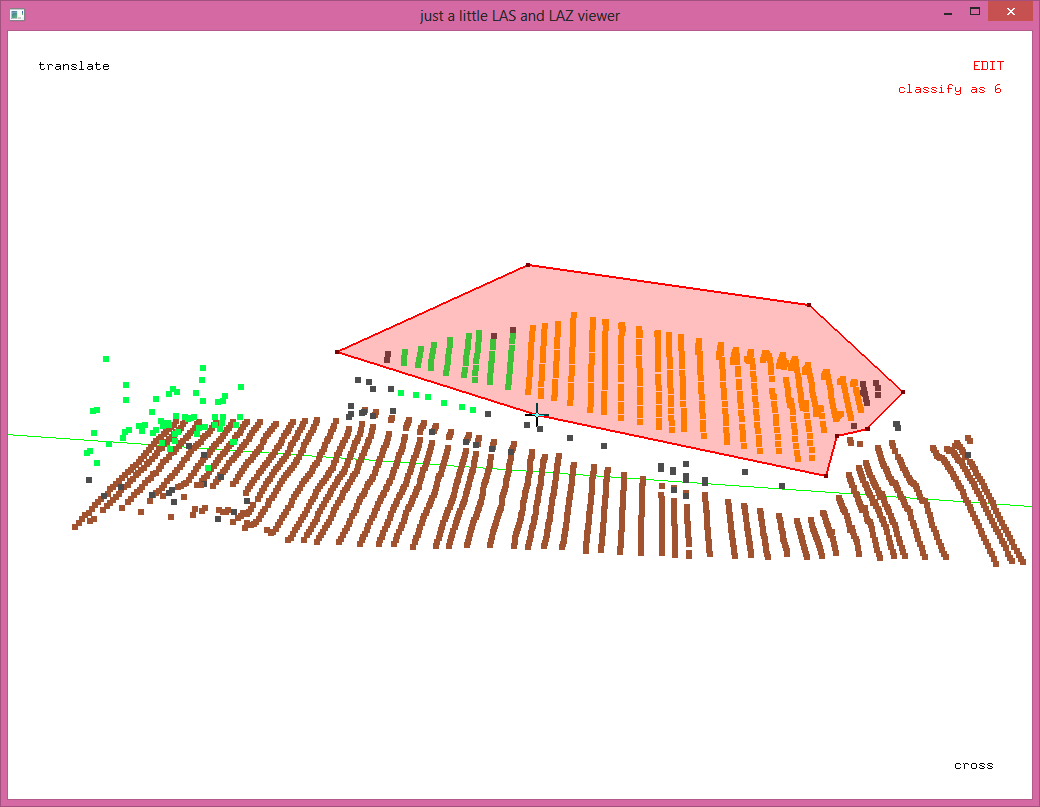 Once you are happy with your polygon press <r> to register the edit. A note appears informing you how many points had their classification changed. In the top right corner an „undo“ counter appears informing you how many changes you can undo by pressing <CTRL-u>. Try it. Immediataly the changes disappear and a „redo“ counter appears instead. Press <CTRL-o> to redo the change you have just undone.
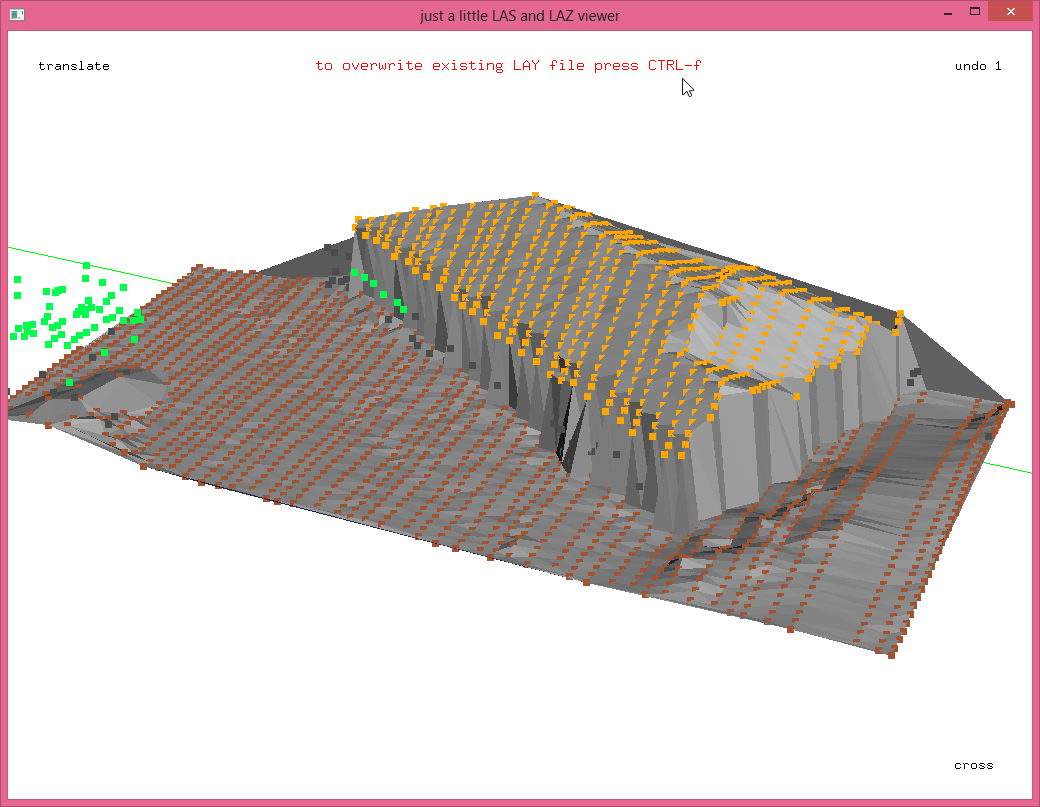
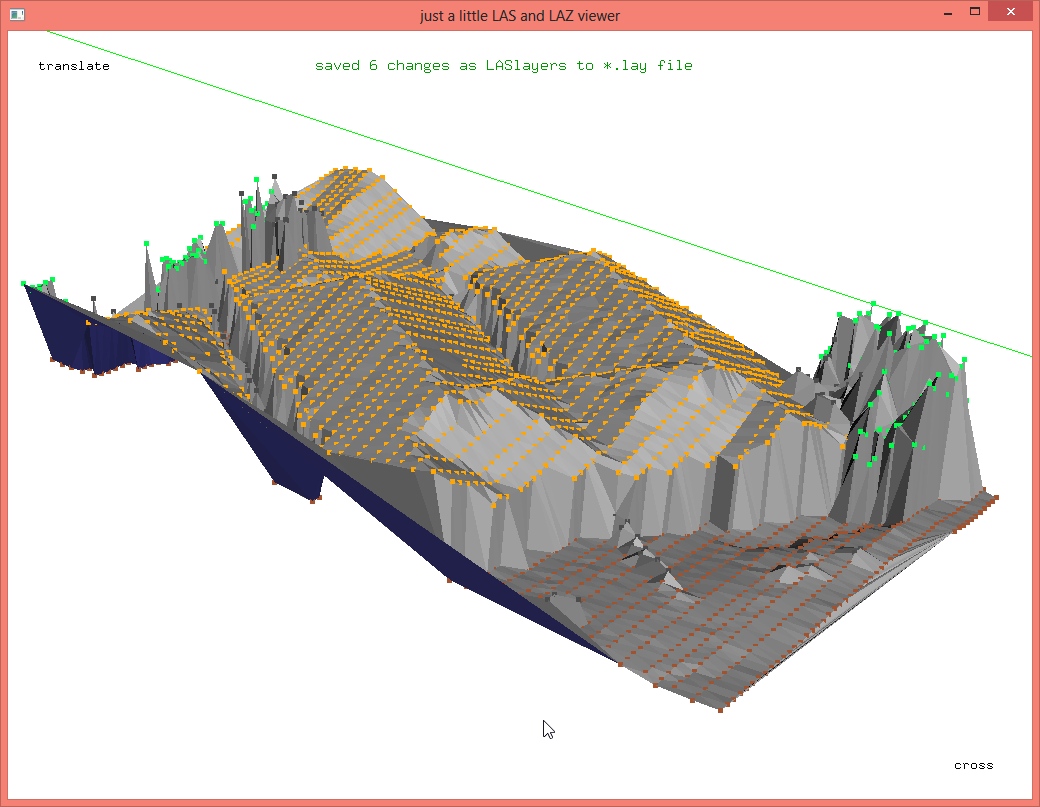
Press <CTRL-s> to save this edit as a tiny LAY file using the recently introduced LASlayers concept. In case there was already an existing LAY file (that was not applied with ‚-ilay‘ when starting lasview) you will be warned and have to press <CTRL-f> to force overwriting it as shown below.
Press the key sequence <SHIFT-b>, <t>, and <a> to get the same visuals above.
Press <SHIFT-t> to remove the triangulation again. After saving an edit it can no longer be undone via <CTRL-u>. Instead you will have to strip off this particular layer with the layer management available through „laslayers.exe“ as described here. Now press <x> to toggle to the „cross select“ view.
Use the <DOWN> arrow to move the selected cross section to the area shown above that has a few unclassified points in the middle of the roof. Press <x> to go back to the „cross“ view and try to understand why these points are not part of the roof. Looks like they are from the top of a chimney, and antenna, or a satellite dish as they do not fit the otherwise planar roof.
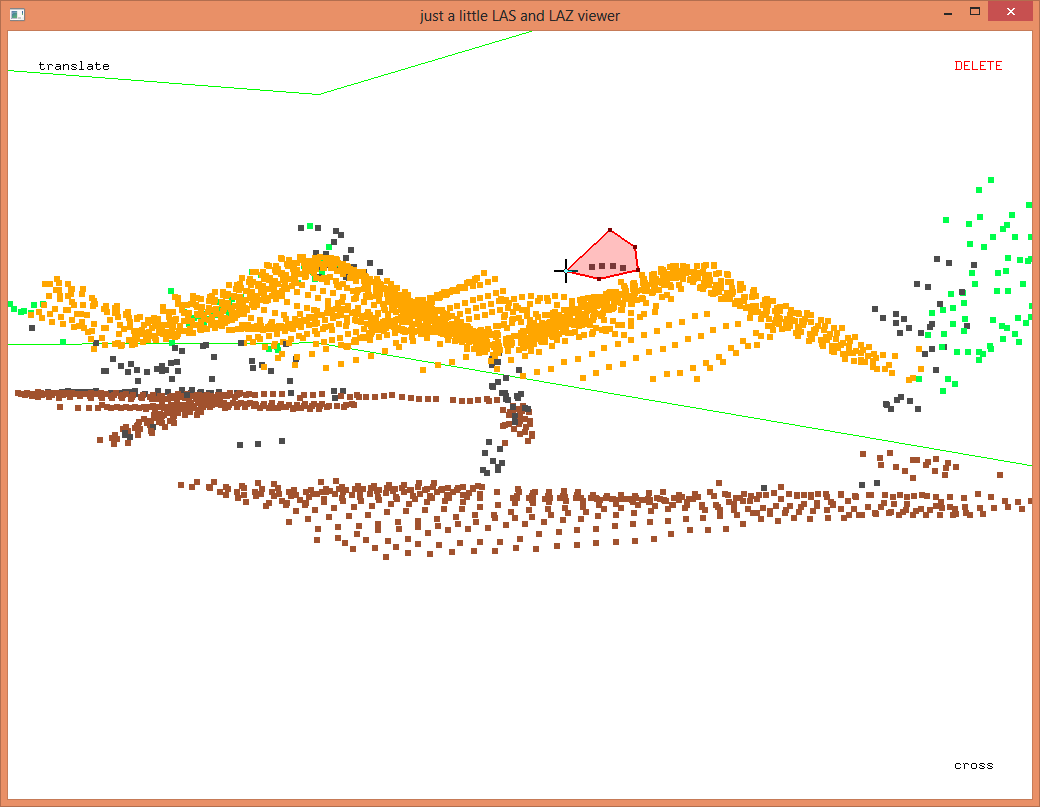
Assume we need to remove them for some reason. Pan, translate, and zoom the view such that these points can be easily surrounded by a polygon. Now press <d> to enter the „DELETE“ mode, fence in these points, and press <r> to register the deletion.
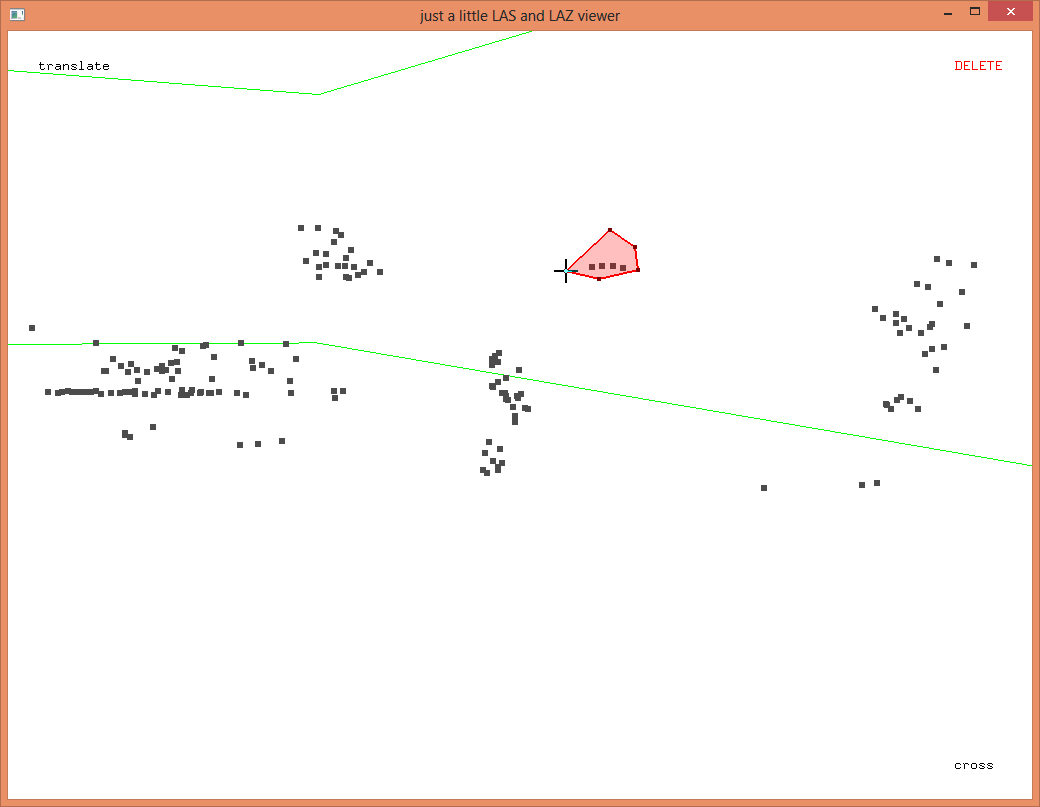
It can be tricky to place a clearly seperating polygon and you may be worried about deleting a few orange building points as well. Press <u> to only display the unclassified points before pressing <r> to register the deletion.
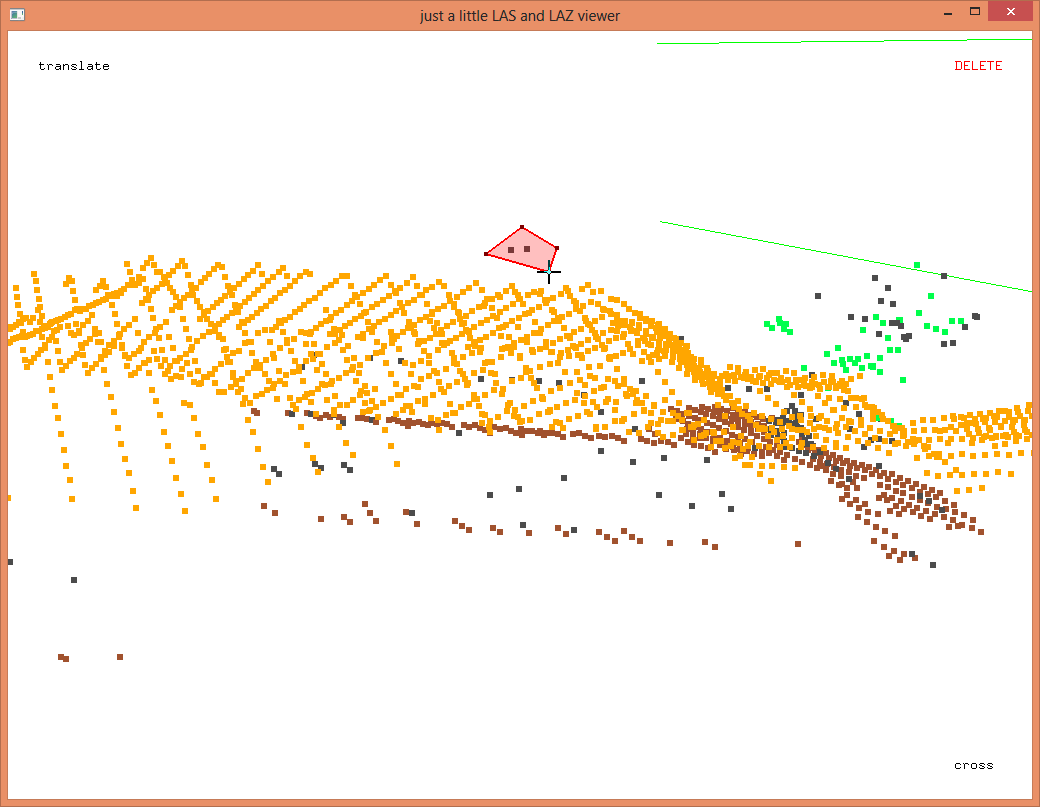
Press <a> to see all points again, then delete the other two points by finding a good view point, pressing <d>, and drawing a polygon.
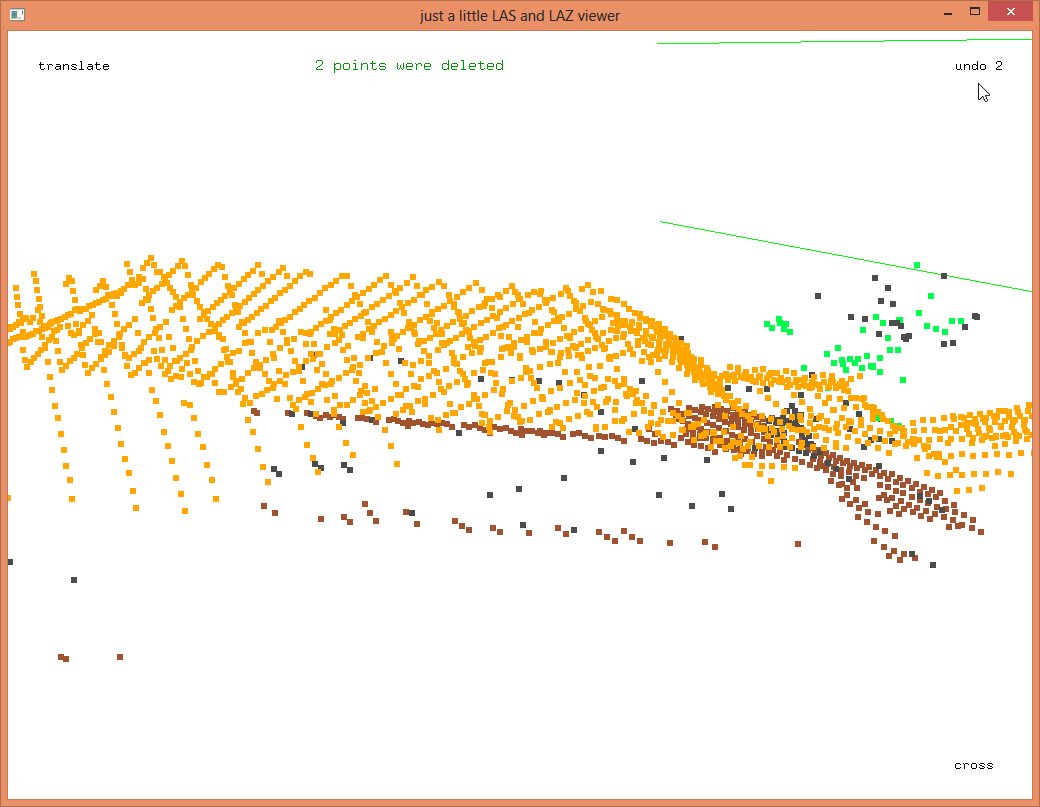
After registering this deletion of two points your „undo“ counter should be at two. Press <CTRL-u> twice to undo this and the last deletion, then press <CTRL-o> twice to redo them both.
Now press <CTRL-s> to save this deletion as another layer. It will be appended to the LAY file that already contains one layer with the roof re-classification edit we did first. Press <t> to triangulate the points in the „cross“ view. See how nicly flat the triangulated roofs are now that we deleted these 6 chimney points.
Look at the size of the tiny LAY file called ‚fusa.lay‘ that is in the same folder as the ‚fusa.laz‘ file. It contains all the edits we have done so far and mine is only 681 bytes in size. The original LAZ file has not changed. Maybe this is all you want for now. You could send only this tiny LAY file to a colleague elsewhere and he or she could apply those changes locally when needed using the ‚-ilay‘ switches. For more on this see the LASlayers page.
C:\lastools\bin>lasview -i fusa.laz
C:\lastools\bin>lasview -i fusa.laz -ilay 1
C:\lastools\bin>lasview -i fusa.laz -ilay 2
However, you may want to eventually apply the changes and produce a new LAZ file. This will be a lot slower as it requires rewriting the entire file. It will also make changes permanent. Press <CTRL-a> and a new file is produced called ‚fusa_1.laz‘ that has 6 points less than ‚fusa.laz‘ and 69 points with a different classification as „building“. One more thing, press <CTRL-x> if you want to toggle between the „cross“ section view and the default view.
 You need to have a license to LAStools to save edits for file that contain 1 million points or more.

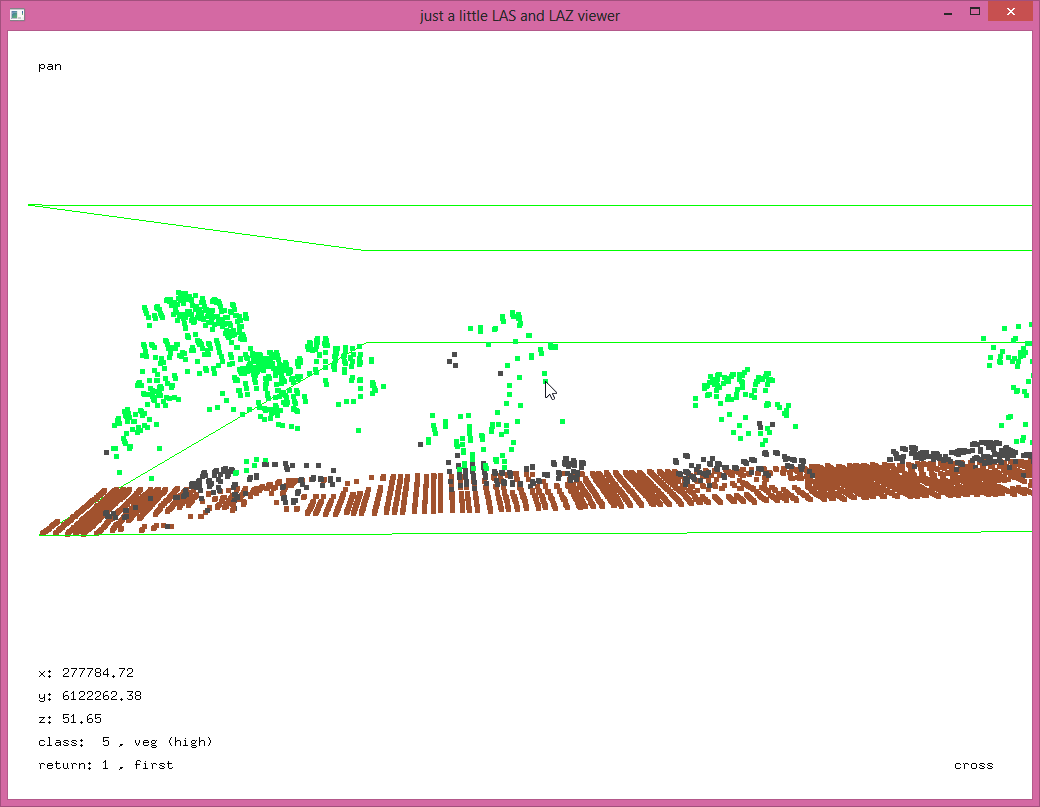


Great question on the facebook page: „Is it possible to load/display background orthophoto?“
You can use ‚lascolor.exe‘ to first color the LAS/LAZ file with an orthophoto and then use ‚lasview.exe‘ for editing the colored point cloud. To avoid rewriting the raw LAS/LAZ file with colors you can also use LASlayers: First run ‚lascolor.exe‘ with the option ‚-olay‘ and then run ‚lasview.exe‘ with the option ‚-ilay‘. At the very end you could delete the colors stored in the first layer with ‚laslayers.exe -i fusa.laz -del 1‘.
This doesn’t work exactly as described here for me.
Pressing „x“ does nothing, however pressing „d“ seems to have the desired effect.
No text is displayed when re-classifying points (such as the summary of how many points etc…
Also CTRL-s doesn’t do anything and I can find no way of saving the changes I manage to make.
Any ideas?
I think you need to upgrade to the latest version (140301). Check with „lasgrid -version“ or look in the GUIs …
Hello
How can zoom in , zoom out or can I have a magnify window
You can either press the bar a few times to change the interaction mode or hold down ,, or . Make sure you also try the cross dection mode by switching back and forth with …
Hello
Is there a more efficient way to remove electrical lines even without classifying points first?
thanks.
Hello,
I receive this error while saving the .las file after deleting some points.
ERROR unlicensed. over 1 million points. saving not allowed.
How could I solve this error?
Thank you
Either purchase a license or cut your LAS file into smaller tiles (below 1 million) before editing.
The ctrl+s doesn’t work for me neither, it automatically shut down the window my version is the last one i guess.
hello
how to classify lidar point cloud into buildings alone by las tools? (lidar points are not classified before hand)
You should either follow the other three tutorial parts (part1, part2, part3) or watch a few of our many YouTube videos via this or this channel.
Pingback: Complete LiDAR Processing Pipeline: from raw Flightlines to final Products | rapidlasso GmbH